Video: Simcenter Tecware Multiple Segments
Want to remove multiple segments of data from a time recording?
This can be done very quickly using the the Tecware Strip Chart display. It is part of Simcenter Tecware (formerly LMS Tecware).
The Tecware Strip Chart display is also available with Simcenter Testlab Revisions 17 and higher, and accessible using Simcenter Testlab tokens.
1. If using Simcenter Testlab and tokens, the Tecware strip chart can be setup by using a small configuration tool. Click here for instructions: Tecware Configuration tool for Testlab tokens.
2. Double click on the LDSF time file in Windows explorer. This will open the data in the Tecware StripChart as shown in Figure 1.
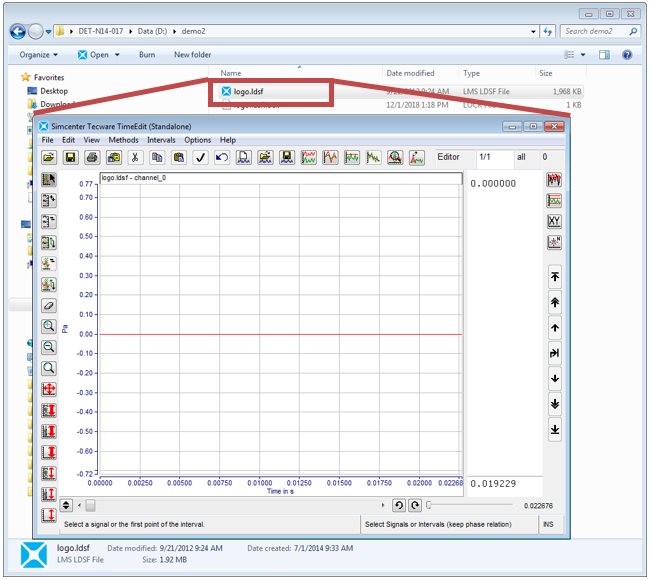
Figure 1: Double click on the LDSF file from Windows explorer to open the data in the Strip Chart display.
The LDSF file should have a blue icon next to it (as shown in Figure 1) if the Tecware Strip Chart was installed properly. If there is no icon, then see step 1 again.
3. After the strip chart is opened, only a small portion of the beginning of the time history is shown. To see the entire time history, move the slide bar in the lower right all the way to the right. Select the channel to be viewed using the arrows on the middle right of the strip chart. See Figure 2.
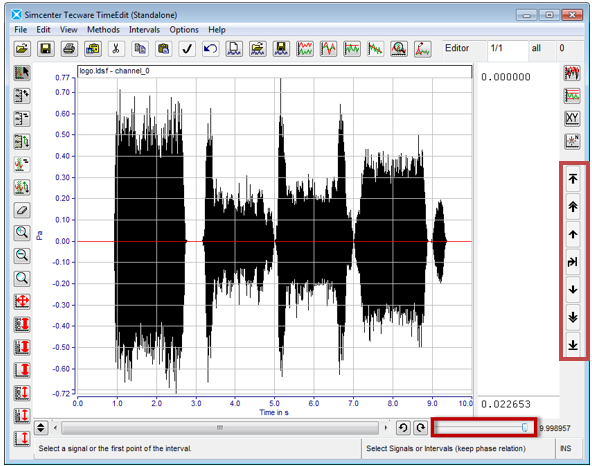
Figure 2: View the entire time history by using the slide bar in the lower right of strip chart. Use the arrow keys on the right to view different channels.
4. To display more than one channel at a time by choosing “View -> View Properties…”. Use the shift or control key to select multiple channels by setting “Yes” next each channel under the Display column as shown in Figure 3.
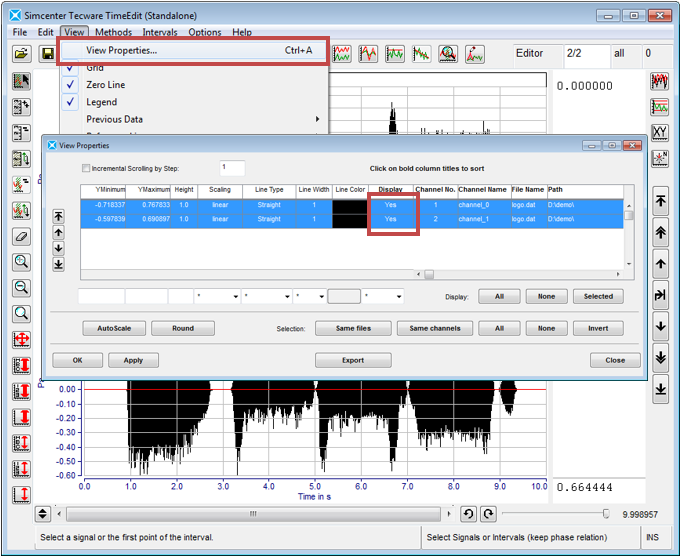
Figure 3: Use "View -> View Properties..." to view multiple channels.
5. Click on segment selection icon in upper left of Tecware strip chart. Select segments by clicking once at beginning of desired segment and once at end of desired segment (Figure 4):
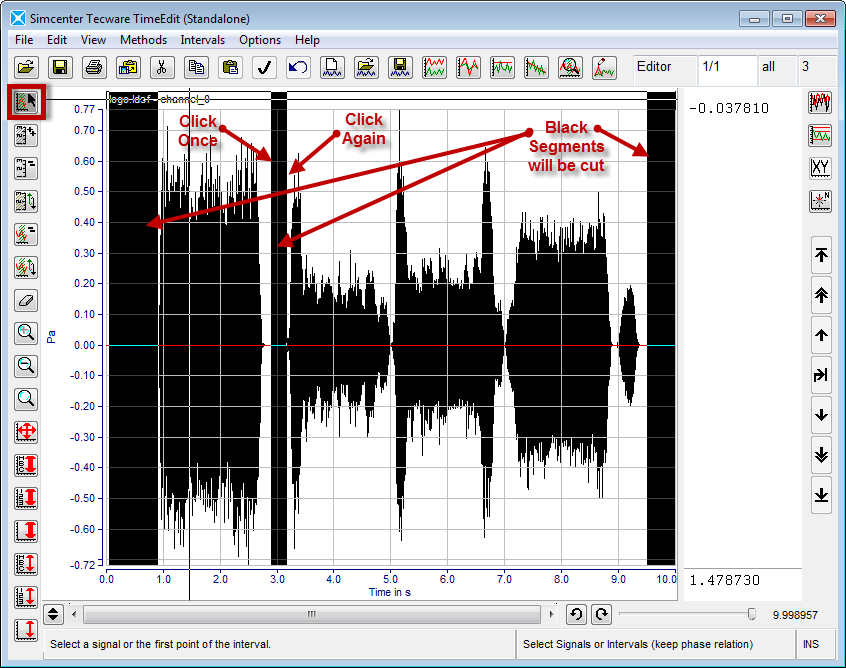
Figure 4: Multiple segments can be highlighted in the Tecware Strip Chart.
Multiple segments can be selected this way. They are shown in black.
6. Press cut icon or pick “Edit -> Cut” to remove segments.
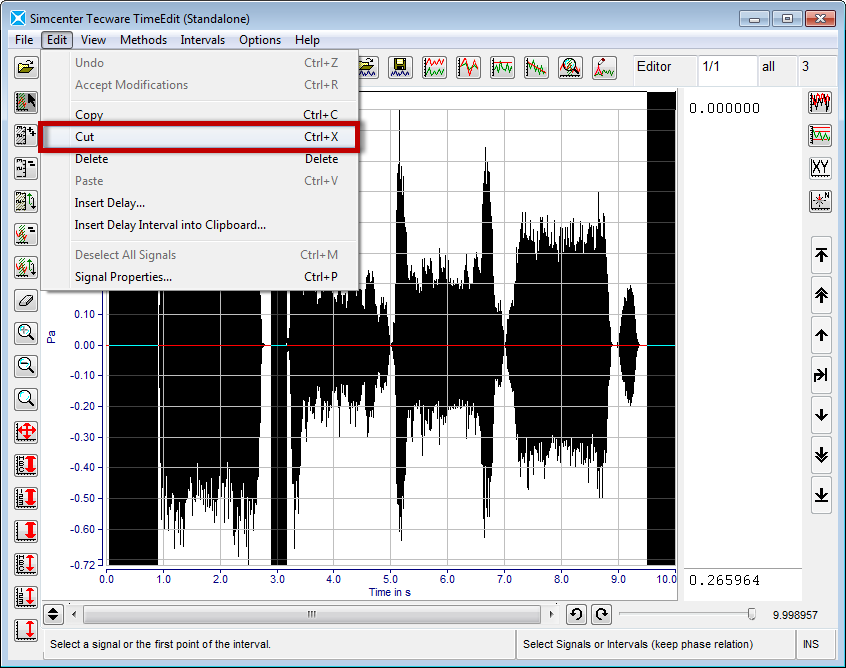
Figure 5: Choose "File -> Cut" to remove the highlighed segments from the data.
7. After performing the cut, the original trace is shown in grey, and the new trace is shown in black:
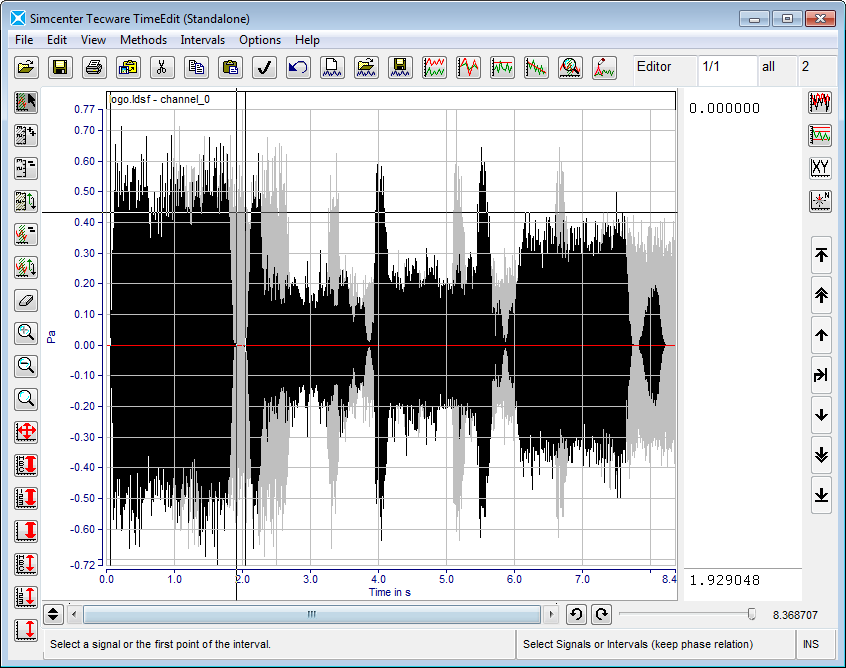 Figure 6: The original trace is shown in black, and the edited trace is in grey.
8. Choose “File -> Save Signals As” to store to new file name. Press the “Continue…” button.
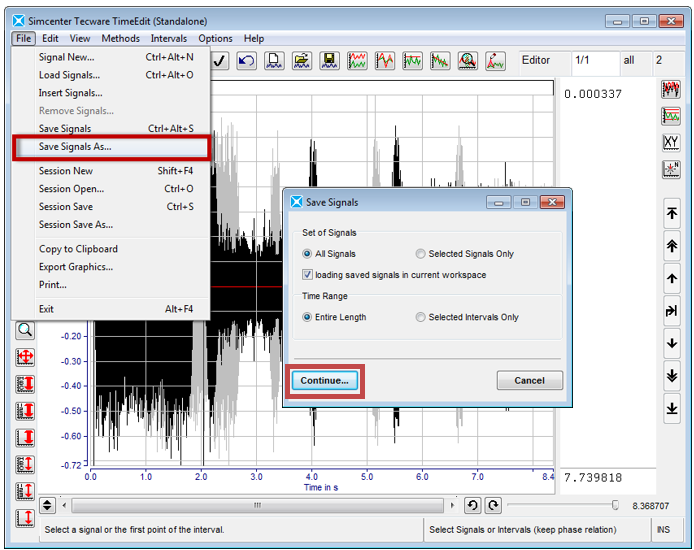
Figure 7: Choose "File -> Save Signals As..." and "Continue..."
8. Select a directory to store the data. Make sure LDSF is selected. Give the file a new name and press the OK button.
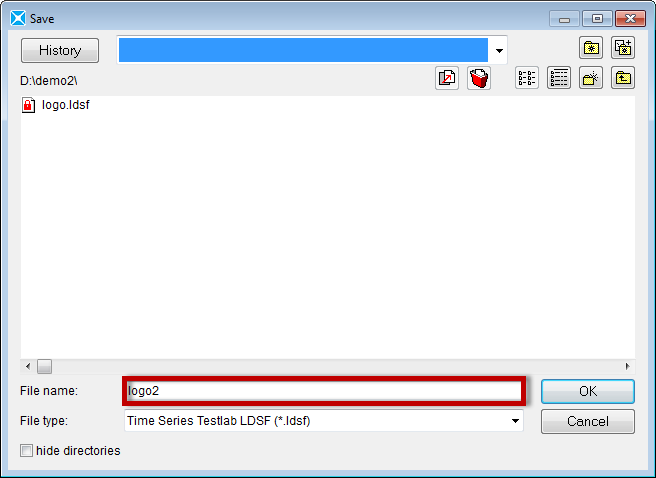
Figure 8: Give the file a new name and press the OK button.
Now the edited file is available for futher processing.
Questions?. Email peter.schaldenbrand@siemens.com or Siemens Support Center.
Related Durability Links:
Simcenter Tecware Links:


