Video: Simcenter Tecware Spike Filter
Have data with spikes or dropouts? Facing the prospect of re-instrumenting and acquiring again?
Sometimes there can be dropouts or spikes in the signals measured by sensors due to intermittent cable connections, telemetry issues, or other problems. Rather than throwing out this data, it might be possible to make the data useable by removing these spikes.
Removing spikes and correcting dropouts is easy with Simcenter Tecware TimeEdit tool!
Getting Started
If you have TecWare, or have or Testlab tokens, it is possible to run the Tecware TimeEdit tool. Click here for instructions on accessing Tecware TimeEdit with Testlab tokens.
1. From Windows explorer, doubleclick on the time history to open it in Tecware TimeEdit.
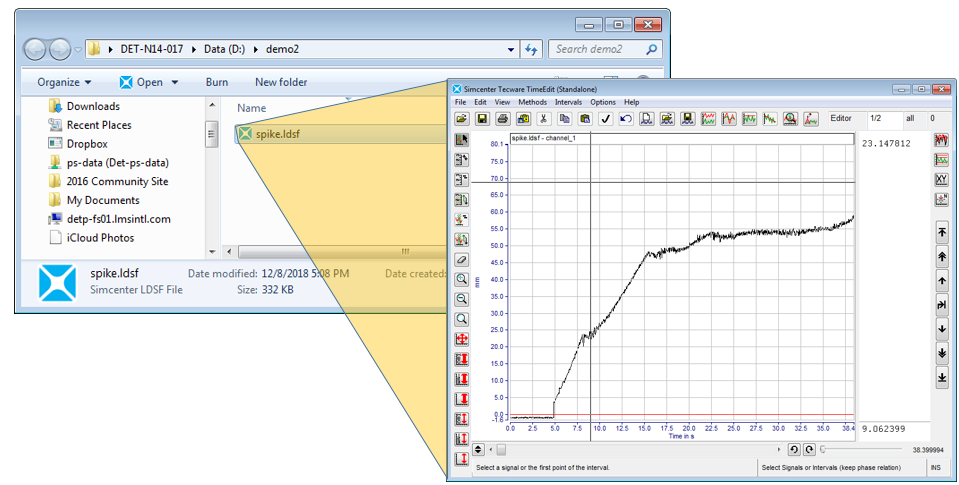
Doubleclick on the Simcenter Testlab LDSF file from Windows explorer to start TimeEdit.
By default, a small part of the beginning of the time history is shown.
2. To see all the time data, zoom out with either the slider bar in the lower right corner OR use the Double Arrow button on the left side of the Time Edit display (CTRL-F).
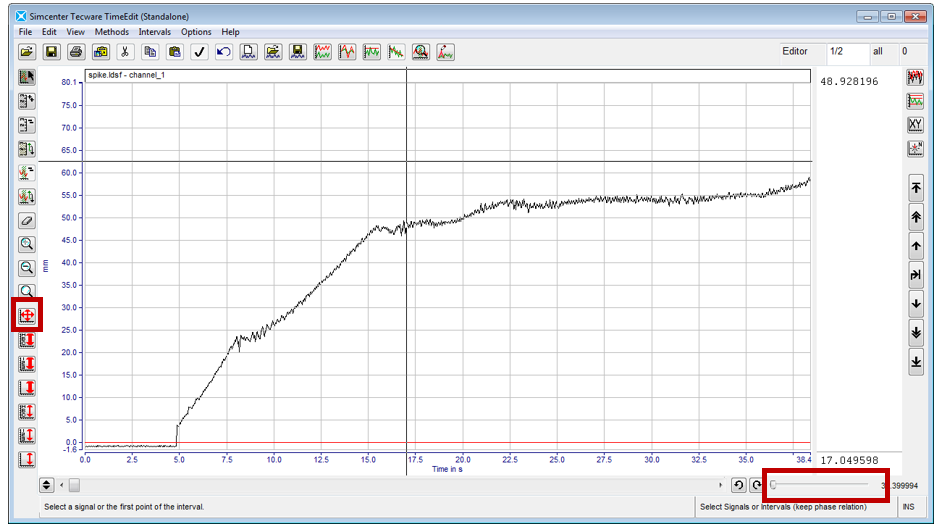
To view the entire time history, either use the slider bar on the bottom right, or click on the overview icon on the left.
There are two modes to remove spikes: manual editing of data points OR the spike filter. These are descibed in the next sections.
Manual Editing
1. Choose the magnifying glass icon (left side of screen) to zoom into the area with spikes.
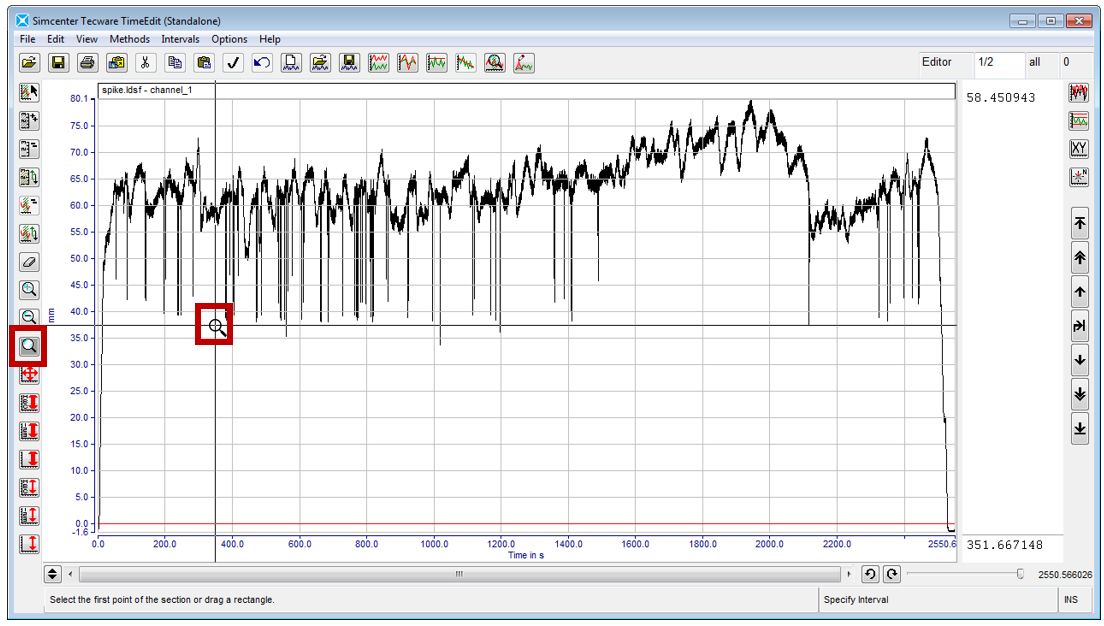
Click on the Freehand Zoom icon on the left side and then select the segment to view.
In the display, click once one each side of the event or events to be zoomed in upon. This can be done multiple times if needed. To zoom back out use CTRL-F.
2. If zoomed in enough, the data points are marked by a ‘+’ sign indicating that they can be edited. At the top of the screen, click on the ‘Move Points’ icon.
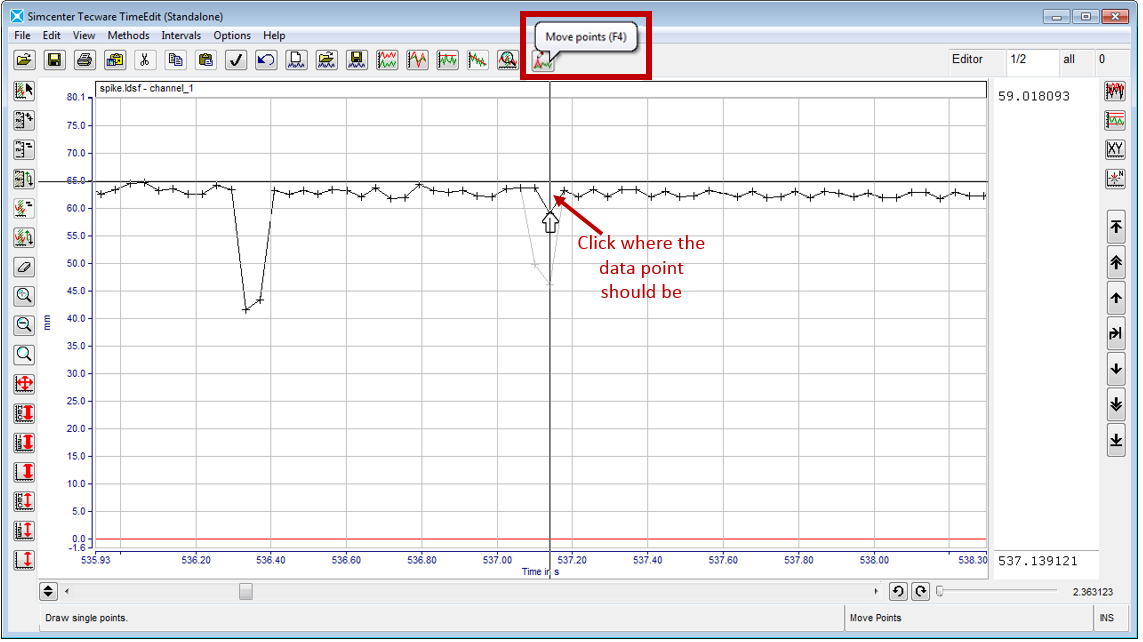
Using the Move Points icon, individual data points can be edited.
Click in the display where the new amplitude of a time history data point should be. The old data trace will be in gray, the new data trace will be in black.
This process is manual, and requires each drop out or spike be addressed individually. After modifying the data, and satisfied with the result, go to the end of the article to learn how to save the modified data.
The manual method is time consuming. An alternative is to use the automated spike filter method, which is described in the next section.
Spike Filter
Tecware TimeEdit has the ability to automatically detect and remove spikes from a time data trace.
1. In the TimeEdit Menu, select “Methods -> Signal Modifications Methods -> Spike Removal”.
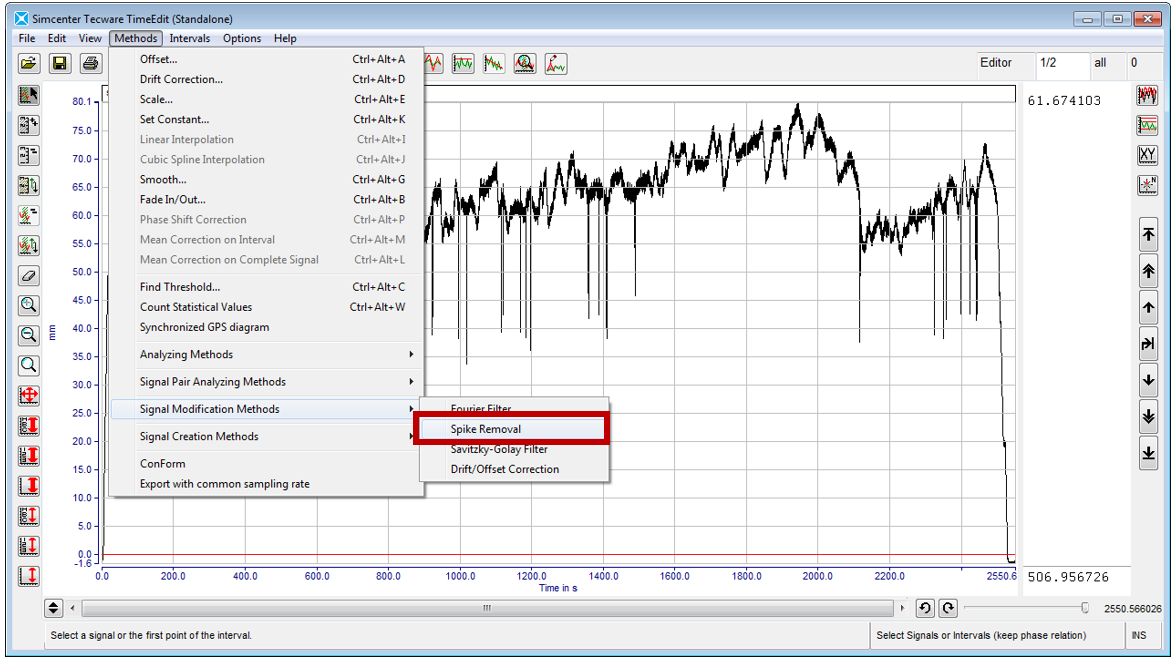
Choose "Methods -> Signal Modification Methods -> Spike Removal"
2. Parameters for how the spikes are determined are set in the Spike Filter menu. Statistics are performed on small data blocks – both the mean and variance of these blocks are calculated and compared.
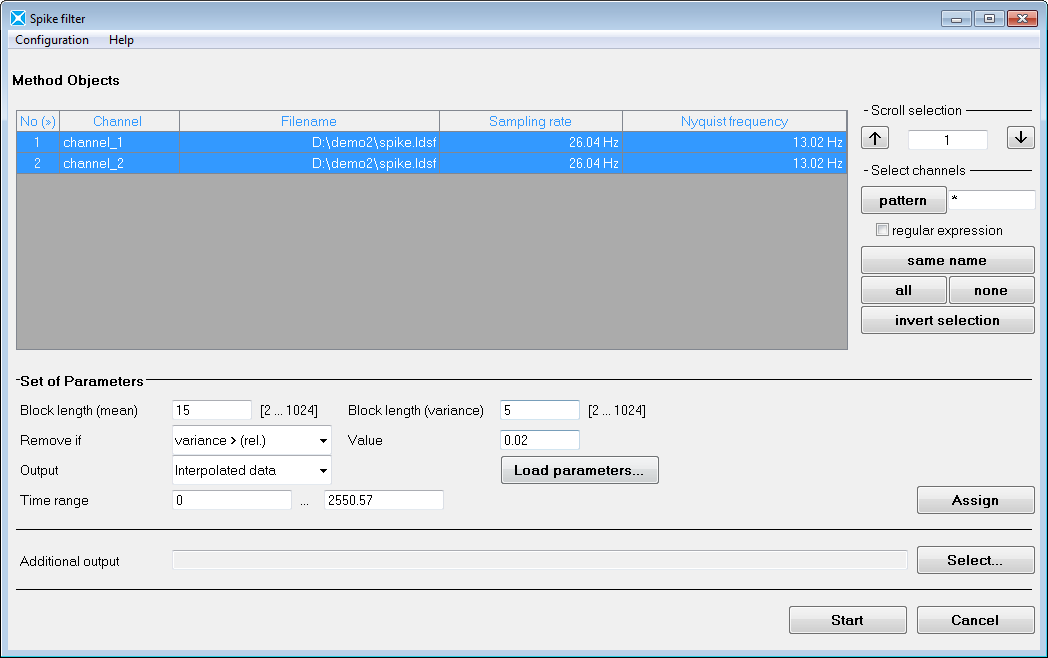
In the spike filter menu, the data points used in the mean and variance calculations are defined.
When the variance exceed a specific threshold, a peak is identified, and the data is replaced. Press the Start button.
3. After the calculation is done, the original trace is shown in gray, while the new trace is shown in black.
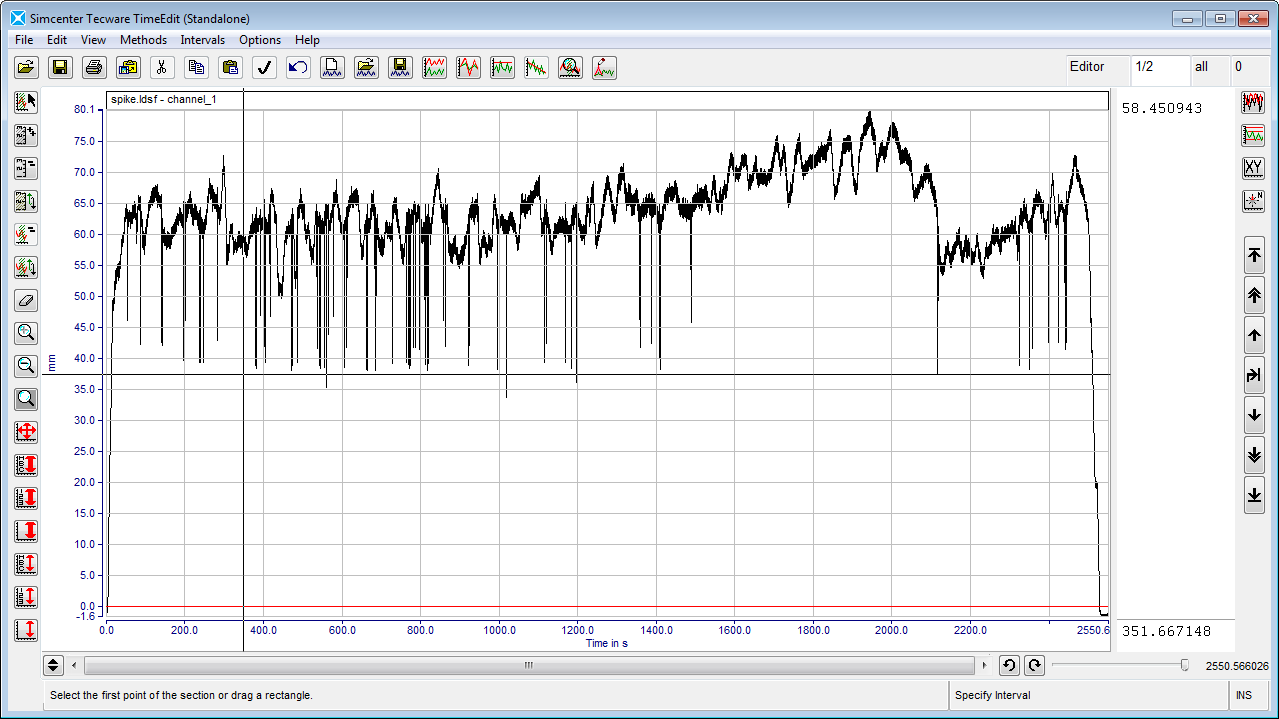
The original signal is in gray, while the modified signal is in black.
Parameters can be adjusted as needed to properly identify the spikes.
Saving Modified Signal
The modified data can be saved to a new LDSF file or other file format.
1. In the TimeEdit Menu, choose “File -> Save Signals As” to store the modified signal.
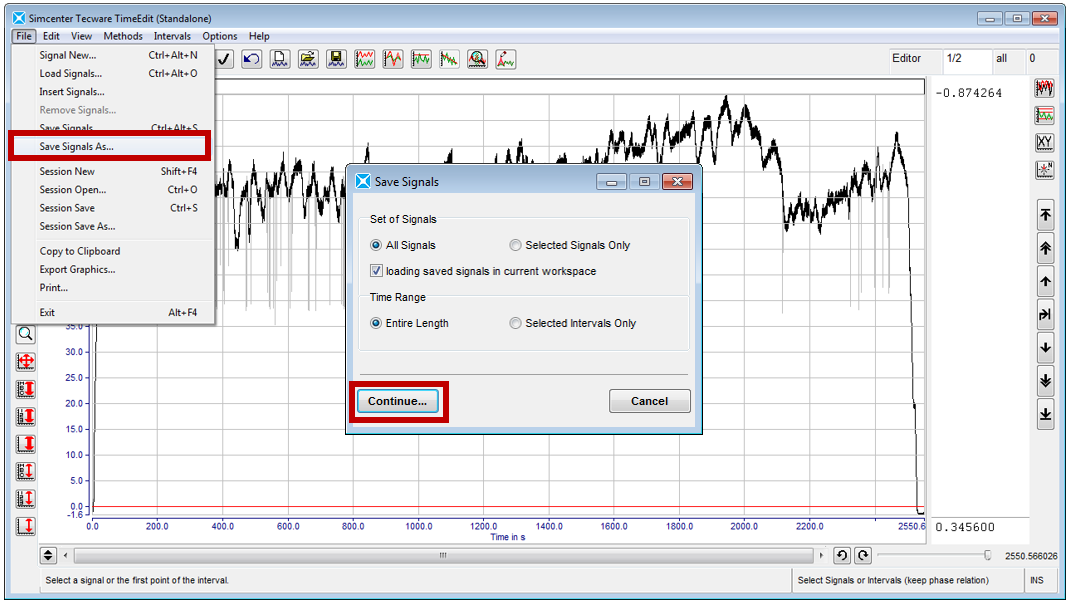
Choose "File -> Save Signals As" and press continue to store the modified data.
Press the Continue button.
2. Give the file a new name. Select the File Type for the modified data (LDSF, RPC, etc).
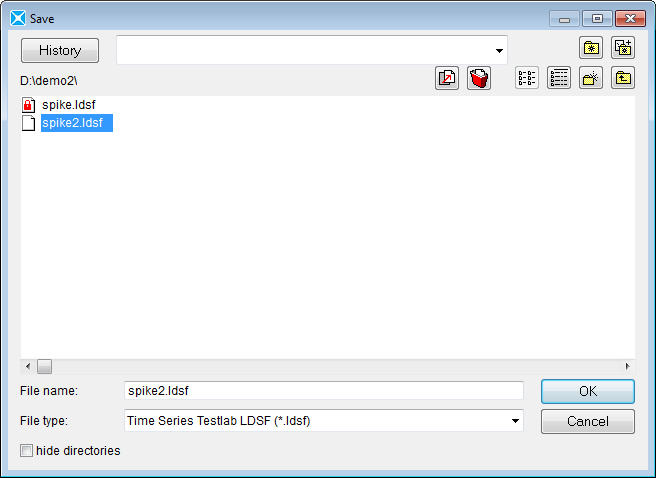
Store the data to a new name, with LDSF selected as the file type.
Finished!
Questions? Email peter.schaldenbrand@siemens.com or contact Siemens Support Center.
More Fatigue and Durability links:
Simcenter Tecware Links:


